Cutting slots in the bumper for spot light brackets
There are 2 types of bumper – those on cars made up to 2009 and those made after. The first set of instruction are for the earlier type bumpers and the second set are for the more recent bumpers.
Stick paper templates to bumper
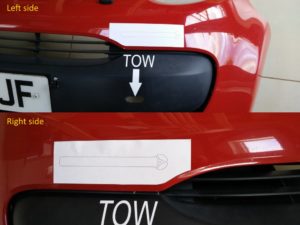
Cut out the paper templates and stick them to the left and right side of the bumper in the positions shown. Scotch Mount is a great glue to use – it comes in a spray can, is re-positionable and can be easily removed with brake cleaner. Copydex also works well. Remember, after you’ve cut out the slots you’ll want to remove the template.
Drill holes
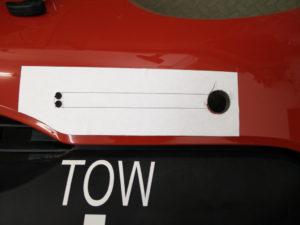
Drill 2 x 6mm diameter holes in the corners as shown. These will help stop the cracks from propagating if (when) the bumper gets kissed.
Drill the large hole with a 20mm diameter hole saw. Don’t go too fast, this plastic has a low melting point and it makes a bit of a mess if you put too much heat into it.
Join up the dots…
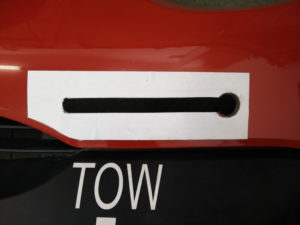
Cut along the lines between the 3 holes with a jigsaw with a fine, but sharp blade.
Clean up
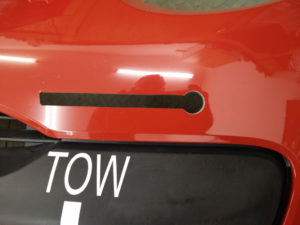
Remove the paper template and remove any adhesive residue.
De-burr the cut out with a de-burring tool or a sharp knife.
2009 onwards bumpers
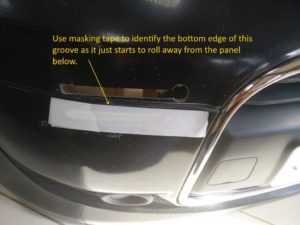
Identify the lower edge of the bumper groove
The template is a bit more tricky to align because the feature edges are not as well defined as the earlier bumper.
Use a bit of masking tape to identify the BOTTOM of the groove edge as it starts to roll away from the vertical face. This will aid aligning the template.
Stick nearside template to bumper
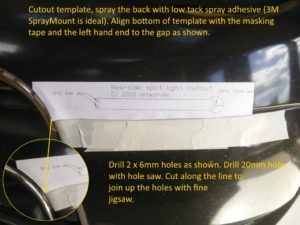
Cut out the paper templates. Stick the nearside template to the left side of the bumper in the position shown. Scotch Mount is a great glue to use – it comes in a spray can, is re-positionable and can be easily removed with brake cleaner. Copydex also works well. Remember, after you’ve cut out the slots you’ll want to remove the template.
Stick offside template to bumper
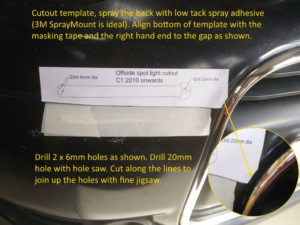
Stick the offside template to the right side of the bumper in the position shown.
Drill holes
Drill 2 x 6mm diameter holes in the corners as shown. These will help stop the cracks from propagating if (when) the bumper gets kissed.
Drill the large hole with a 20mm diameter hole saw. Don’t go too fast, this plastic has a low melting point and it makes a bit of a mess if you put too much heat into it.
Join up the dots…
Cut along the lines between the 3 holes with a jigsaw with a fine, but sharp blade.
Clean up
Remove the paper template and remove any adhesive residue.
De-burr the cut out with a de-burring tool or a sharp knife.
Bolts and spacers
This type of bumper needs longer light bracket bolts and spacers than those supplied in the standard kit. You’ll need to make some spacers 40mm long and buy some M10 x 1.25 x 70mm bolts. Note that the bolts need to be M10 Fine pitch and a standard M10 x 75mm bolt won’t fit.

